
WA Focus exhibition entrance.
1 April - 28 May 2017
Curated by Jenepher Duncan.
Image courtesy of the Art Gallery of Western Australia.
Photo by Bo Wong

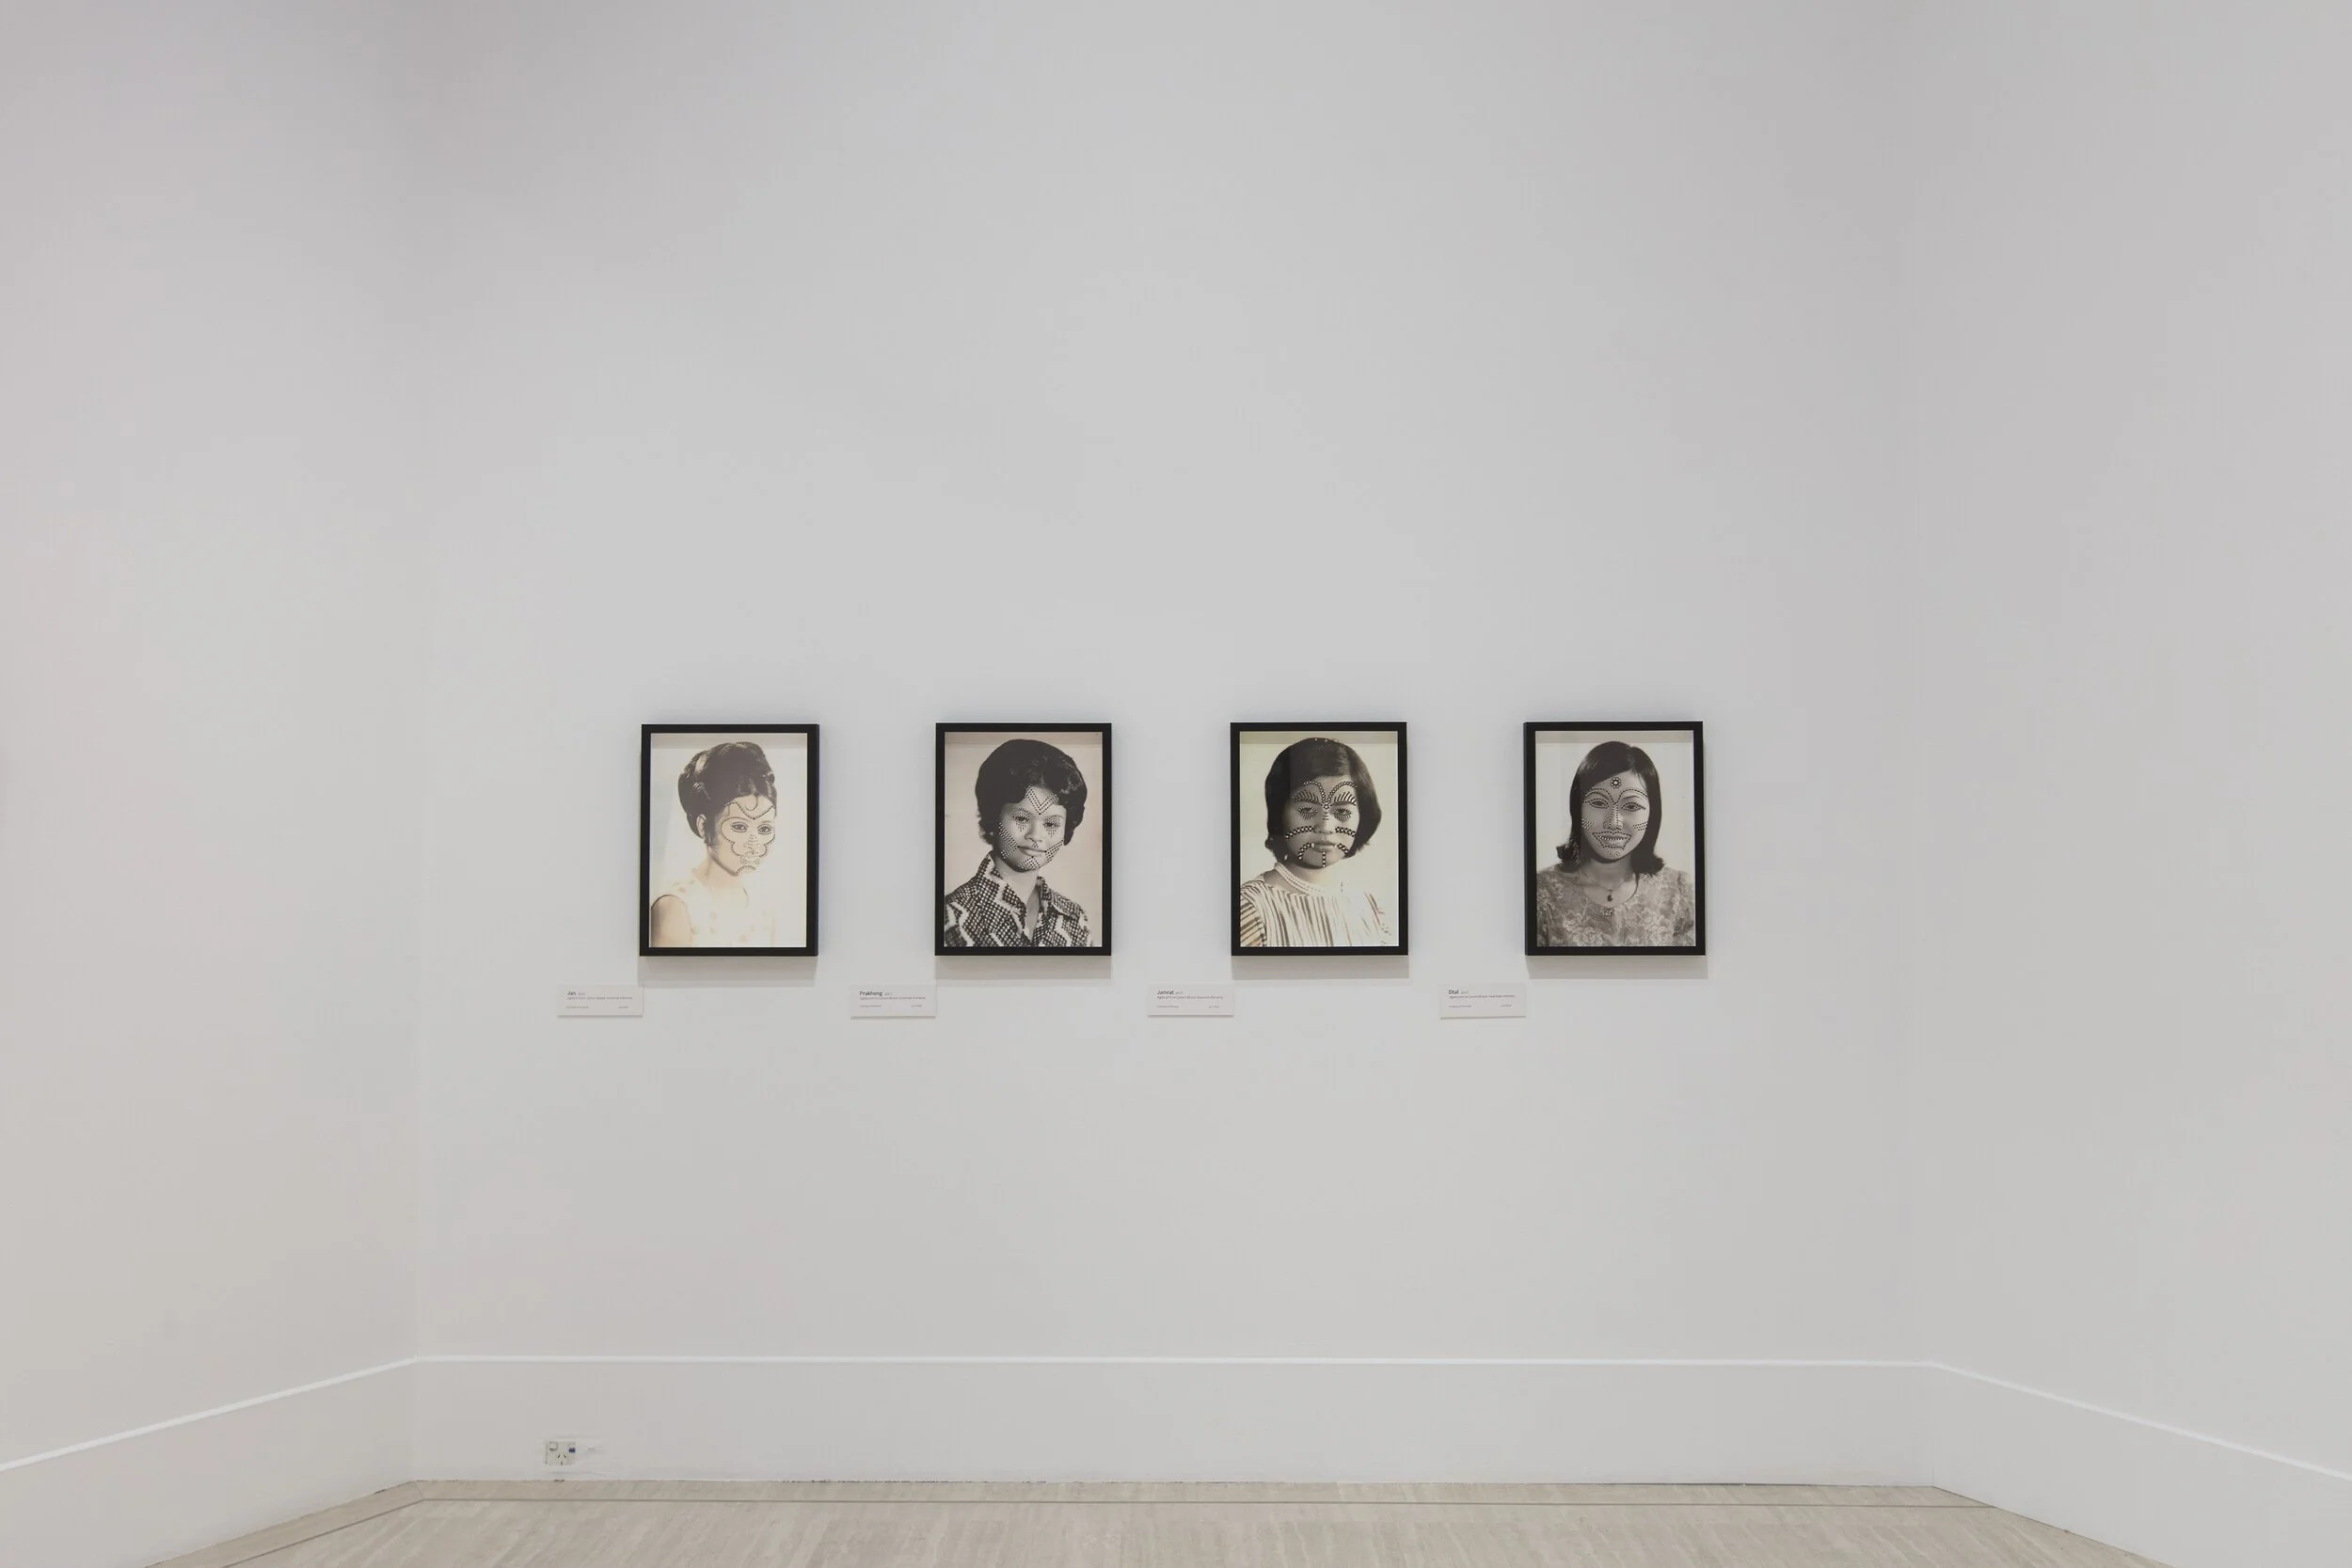
Installation view of expanded Ad Matres series.
Image courtesy of the Art Gallery of Western Australia.
Photographer: Bo Wong

Installation view.
Image courtesy of the Art Gallery of Western Australia.Photographer: Bo Wong

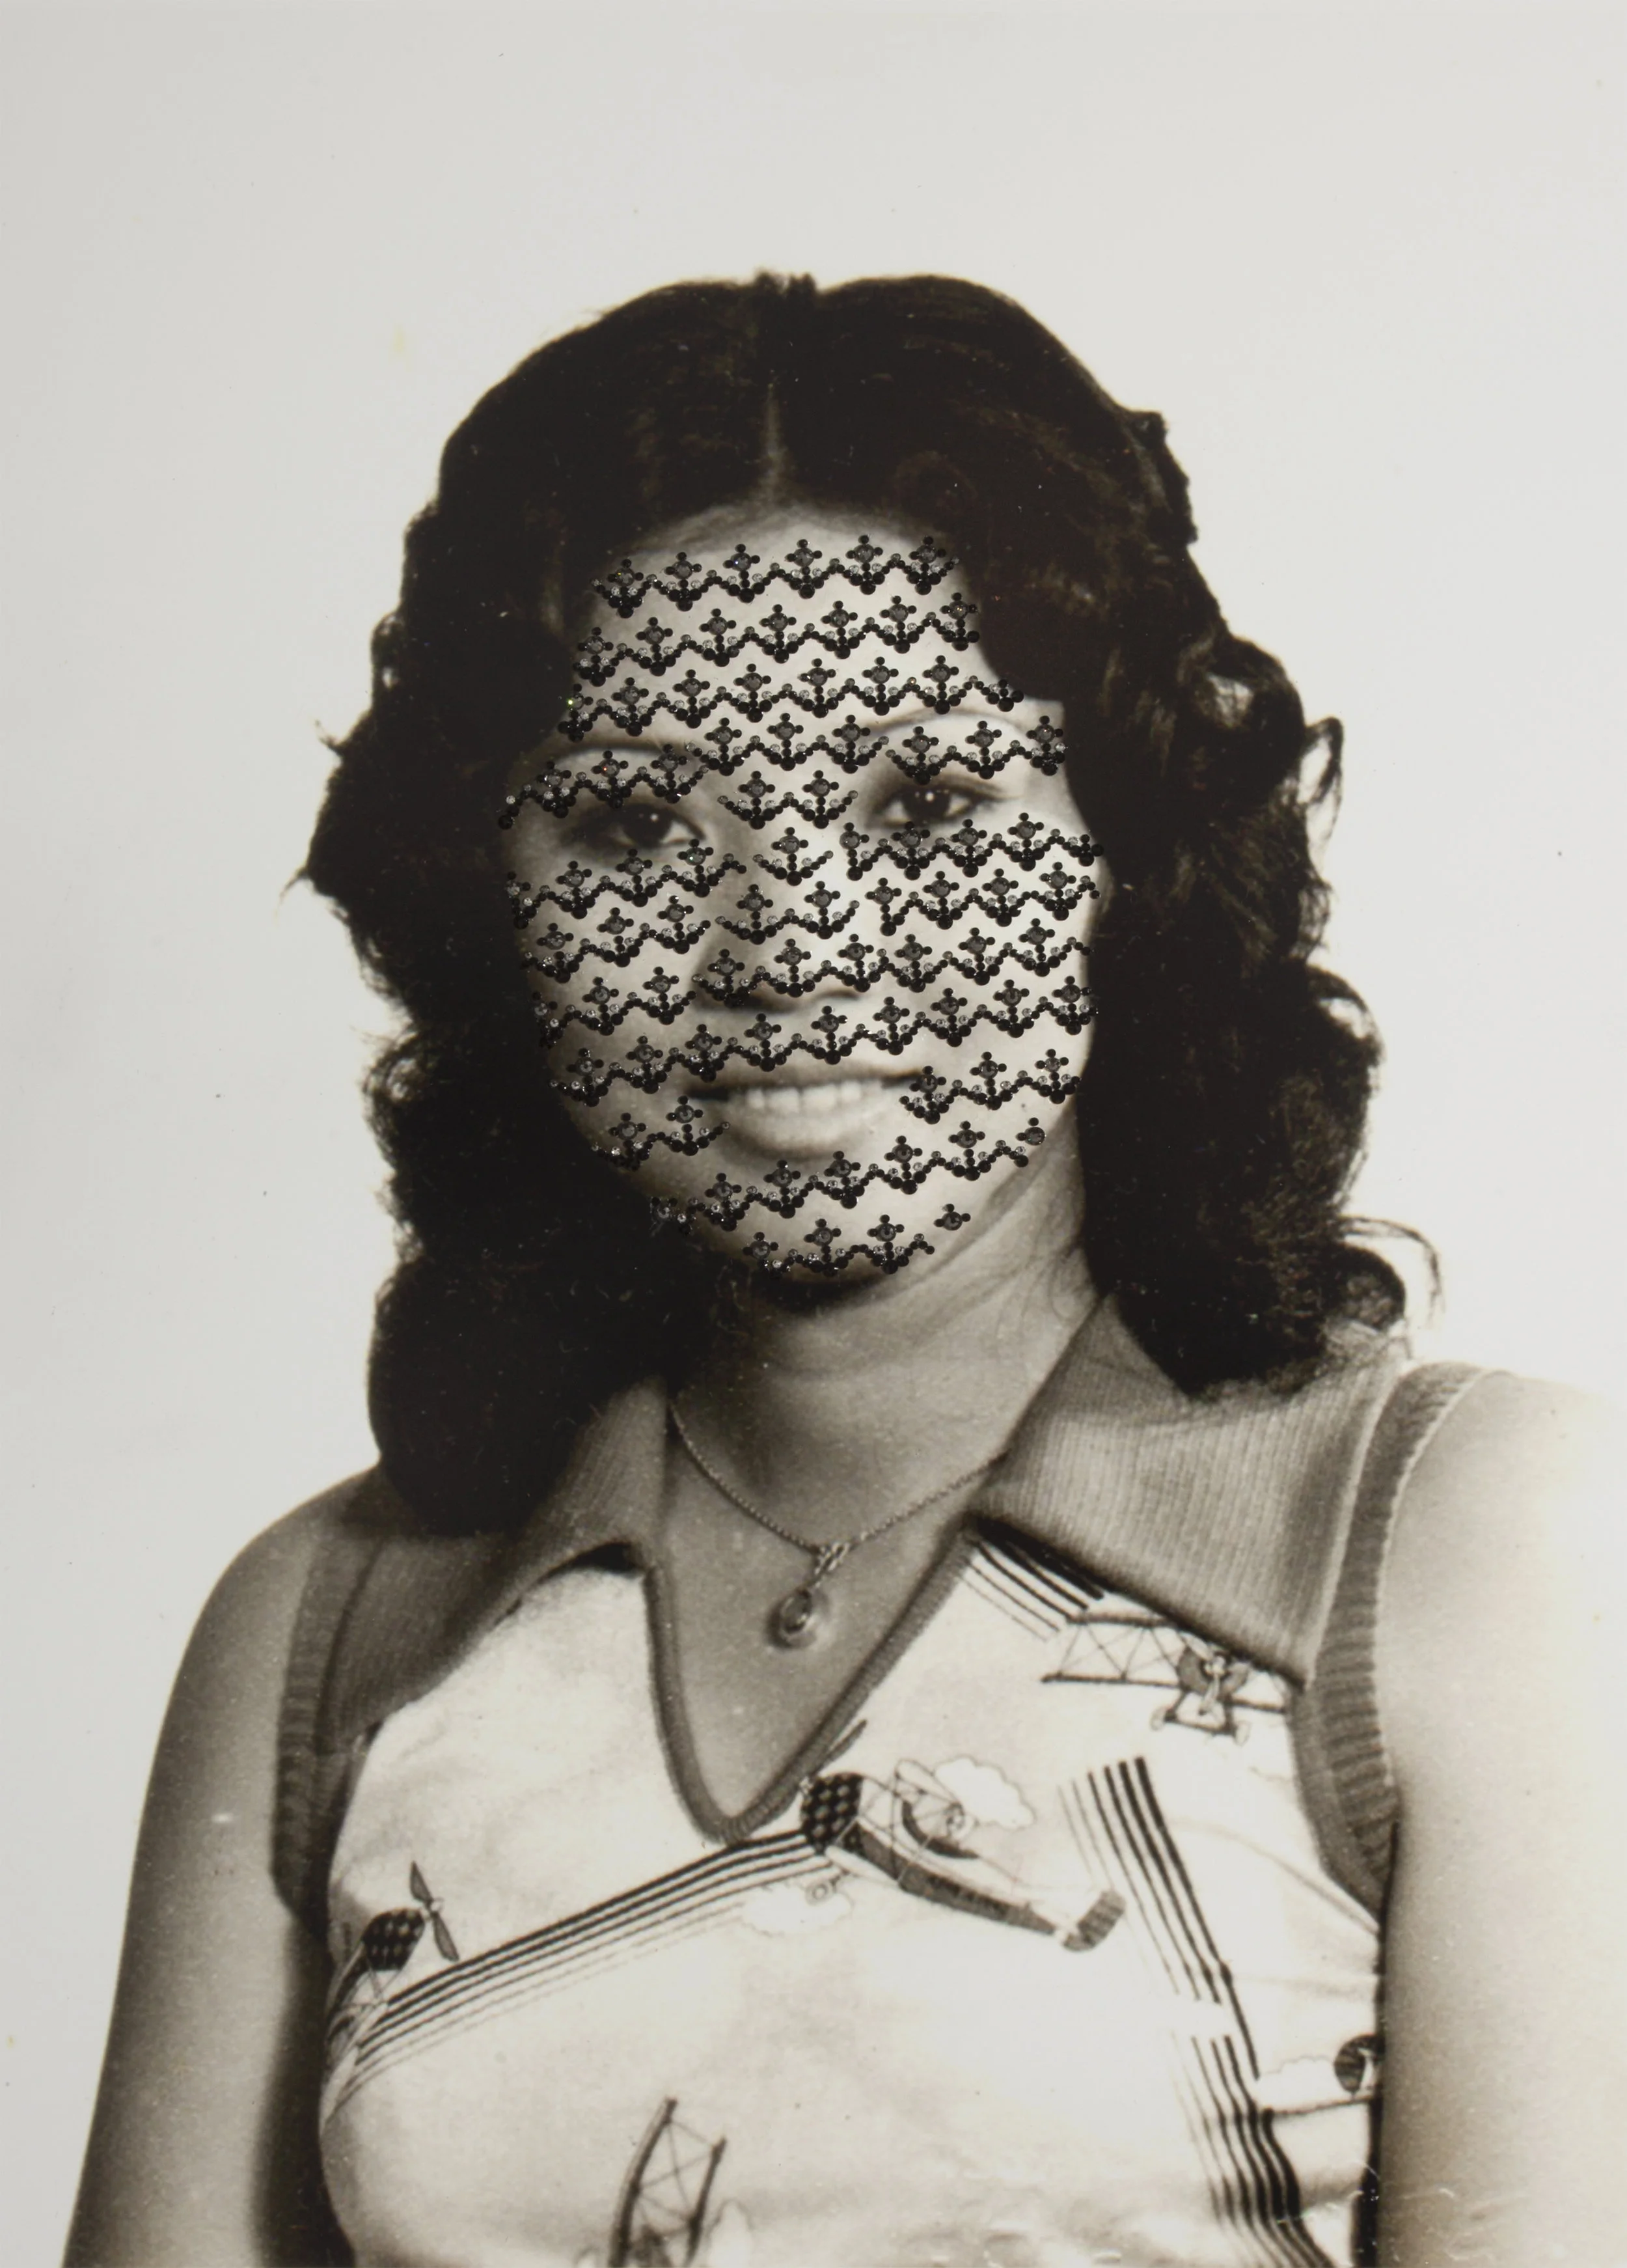
2014-17
Digital print on Canson Baryta, Swarovski Elements.
35.5cm x 48cm
Image credit: Casey Ayres
Edition 2 of 5 unique prints
From the series Ad Matres

2015-17
Digital print on Canson Baryta, Swarovski Elements.
35.5cm x 48cm
Image credit: Casey Ayres
Edition 2 of 5 unique prints
From the series Ad Matres

2015-17
Digital print on Canson Baryta, Swarovski Elements.
35.5cm x 48cm
Image credit: Casey Ayres
Edition 2 of 5 unique prints
From the series Ad Matres

2015-17
Digital print on Canson Baryta, Swarovski Elements.
35.5cm x 48cm
Image credit: Casey Ayres
Edition 2 of 5 unique prints
From the series Ad Matres

2015-17
Digital print on Canson Baryta, Swarovski Elements.
35.5cm x 48cm
Image credit: Casey Ayres
Edition 2 of 5 unique prints
From the series Ad Matres

2014-17
Digital print on Canson Baryta, Swarovski Elements.
35.5cm x 48cm
Image credit: Casey Ayres
Edition 2 of 5 unique prints
From the series Ad Matres
Installation view.
Image courtesy of the Art Gallery of Western Australia.
Photographer: Bo Wong

2017
Digital print on Canson Baryta, Swarovski Elements.
35.5cm x 48cm
Image credit: Joseph Landro
Edition 1 of 5 unique prints

2017
Digital print on Canson Baryta, Swarovski Elements.
35.5cm x 48cm
Image credit: Joseph Landro
Edition 1 of 5 unique prints

2017
Digital print on Canson Baryta, Swarovski Elements.
35.5cm x 48cm
Image credit: Joseph Landro
Edition 1 of 5 unique prints

2017
Digital print on Canson Baryta, Swarovski Elements.
35.5cm x 48cm
Image credit: Joseph Landro
Edition 1 of 5 unique prints

Installation view.
Image courtesy of the Art Gallery of Western Australia.
Photographer: Bo Wong

2017
Digital print on Canson Baryta, Swarovski Elements.
35.5cm x 48cm
Image credit: Joseph Landro
Edition 1 of 5 unique prints

2017
Digital print on Canson Baryta, Swarovski Elements.
35.5cm x 48cm
Image credit: Joseph Landro
Edition 1 of 5 unique prints
2017
Digital print on Canson Baryta, Swarovski Elements.
35.5cm x 48cm
Image credit: Joseph Landro
Edition 1 of 5 unique prints

2017
Digital print on Canson Baryta, Swarovski Elements.
35.5cm x 48cm
Image credit: Joseph Landro
Edition 1 of 5 unique prints

2017
Digital print on Canson Baryta, Swarovski Elements.
35.5cm x 48cm
Image credit: Joseph Landro
Edition 1 of 5 unique prints

Hoong detail.
Image courtesy of the Art Gallery of Western Australia.
Photographer: Bo Wong

Detail of Rampai/Samniang/Ratana/Pornjit.
Image courtesy of the Art Gallery of Western Australia.
Photographer: Bo Wong

Installation view.
Image courtesy of the Art Gallery of Western Australia.
Photo by Bo Wong

Installation view.
Image courtesy of the Art Gallery of Western Australia.
Photographer: Bo Wong

Installation detail.
Image courtesy of the Art Gallery of Western Australia.
Photo by Bo Wong.

2016
Photographic decals on glazed porcelain, PVD coating
Each panel 36cm x 25 x 4cm
Photo by Rebecca Mansell, courtesy of Fremantle Arts Centre Print Award, 2016
Departures detail.
Photo by Uri Auerbach.

Departures detail.
Photo by Uri Auerbach.

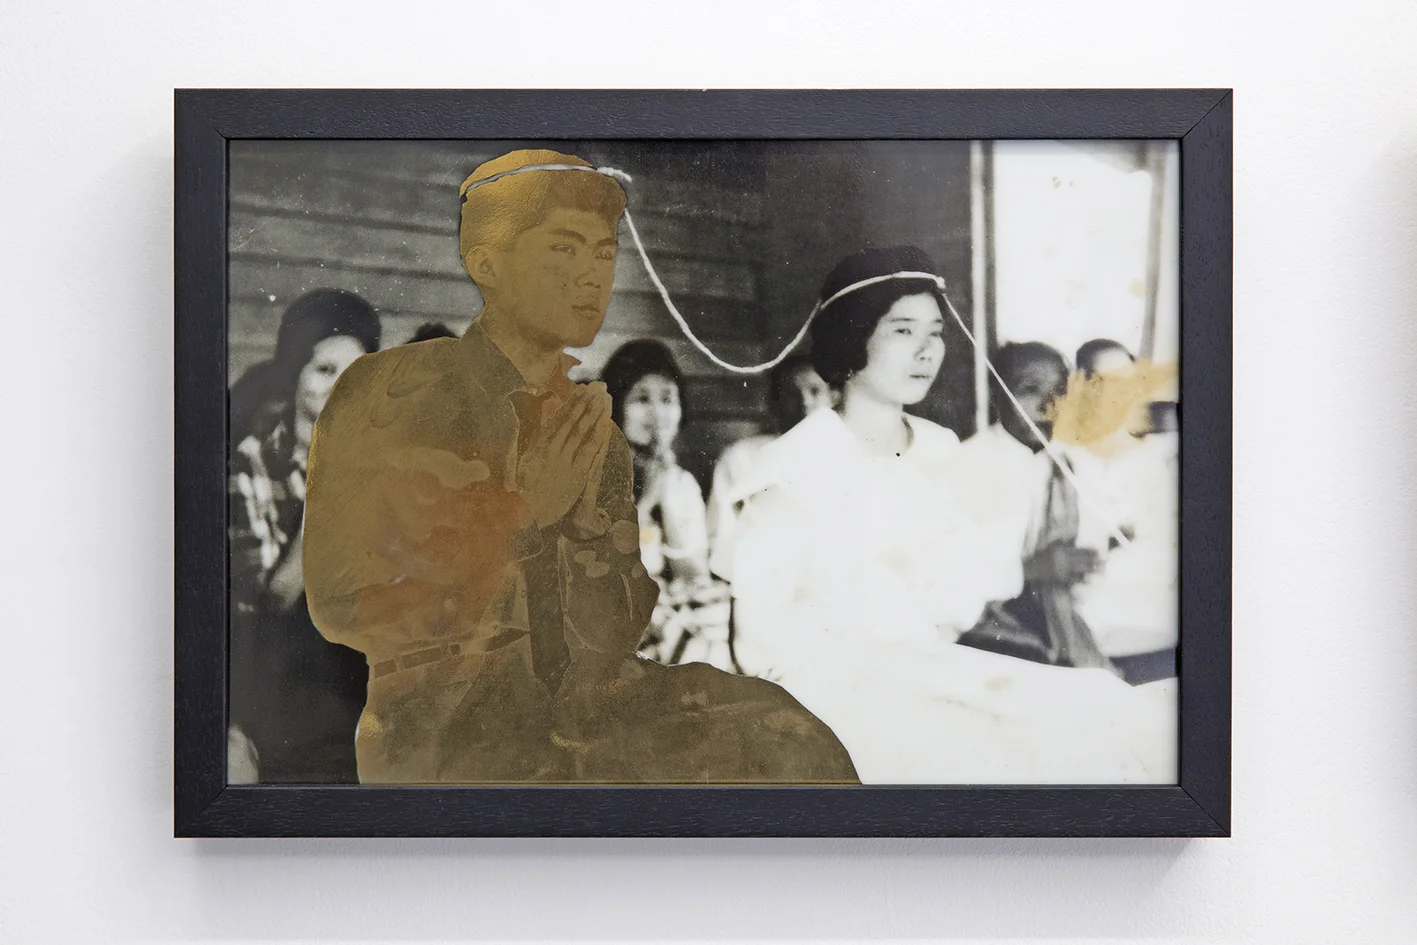
2016
Photographic decals on glazed porcelain, PVD coating
36cm x 25 x 4cm
Photo by Uri Auerbach

2017
Lenticular prints
Each panel 48 x 38 x 4cm
Photo by Uri Auerbach

Installation view.
Image courtesy of the Art Gallery of Western Australia.
Photo by Bo Wong

Anemone detail.
Image courtesy of the Art Gallery of Western Australia.
Photo by Bo Wong.

From left to right: Vale Prajoub and Anemone
Image courtesy of the Art Gallery of Western Australia.
Photo by Bo Wong

Rear installation view of Anemone.
Image courtesy of the Art Gallery of Western Australia.
Photo by Bo Wong.
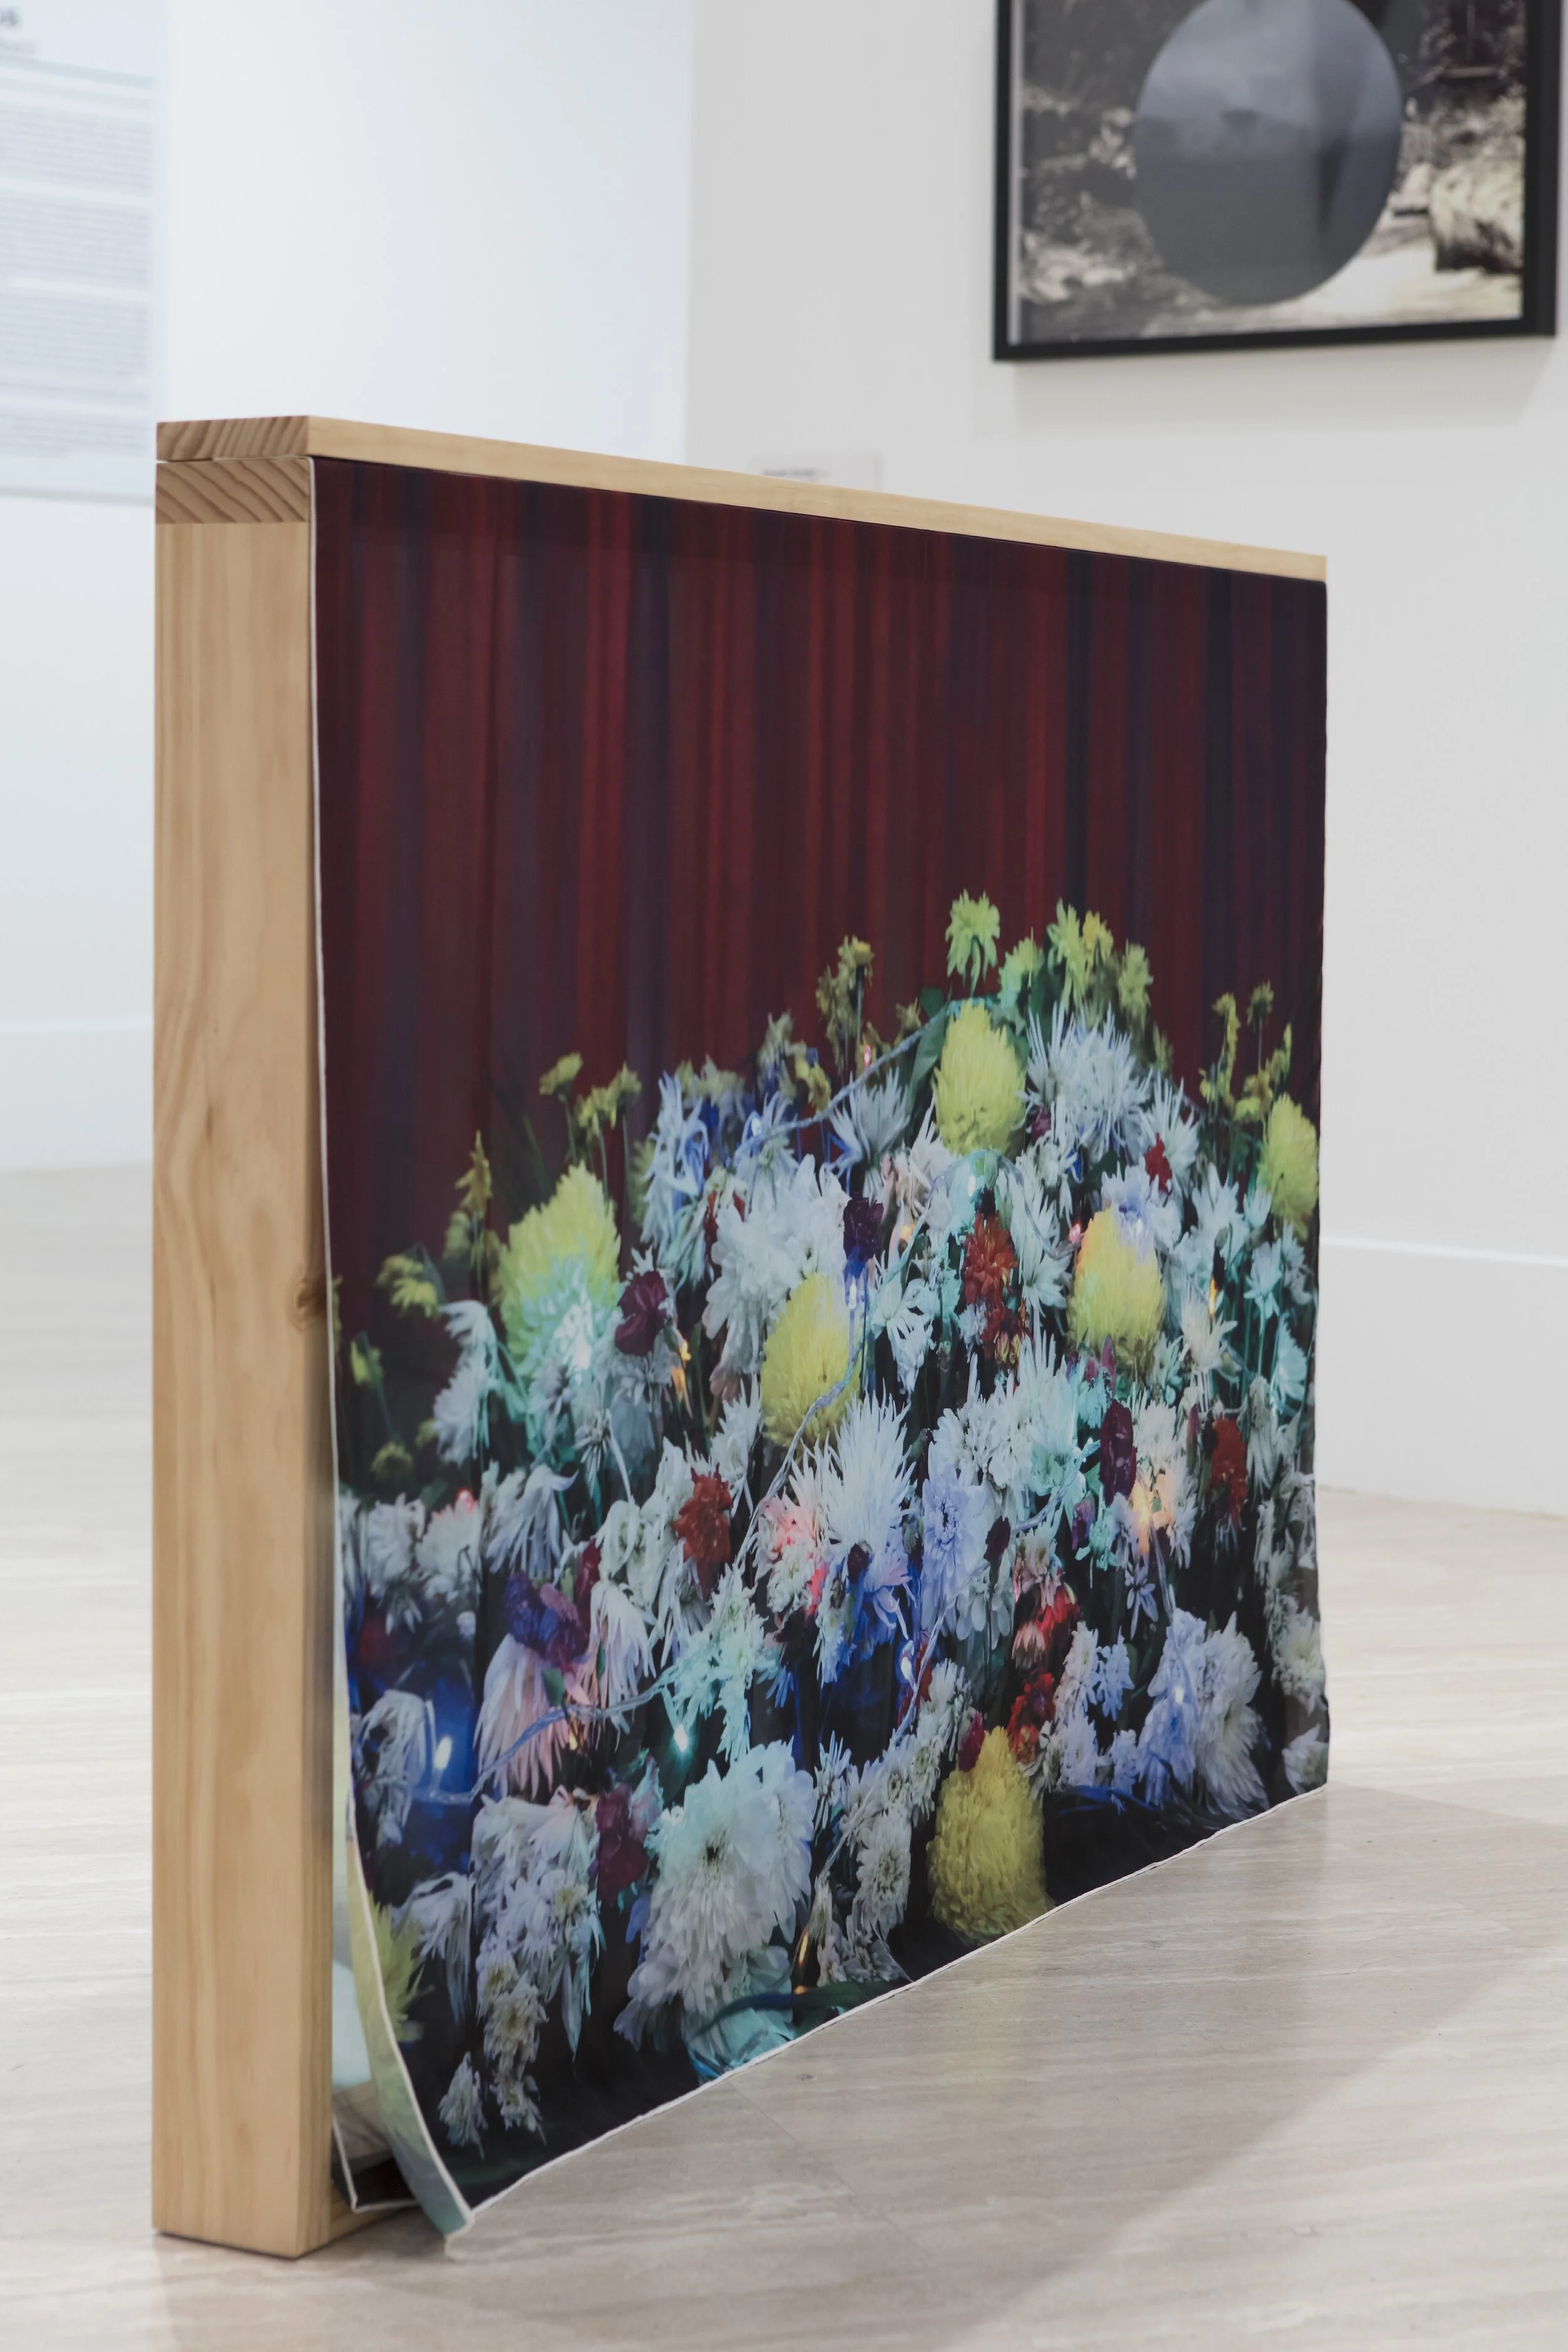
2014-17
Digital prints on synthetic silk, pine, magnets, polyurethane
90 x 134.5 x 9cm
Image courtesy of the Art Gallery of Western Australia.
Photo by Bo Wong.

2014-17
Digital print on synthetic silk, sequins, thread
Diptych; 128 x 169.5cm (each)
Image courtesy of the Art Gallery of Western Australia.
Photo by Bo Wong.

Vale Prajoub detail.
Image courtesy of the Art Gallery of Western Australia.
Photo by Bo Wong.

Vale Prajoub detail.
Image courtesy of the Art Gallery of Western Australia.
Photo by Bo Wong.

2017
Digital print on acrylic, neon, 4-channel transformer
125cm x 85cm x 10cm
Photo by Christophe Canato
Exhibited in the 2017 John Stringer Prize
